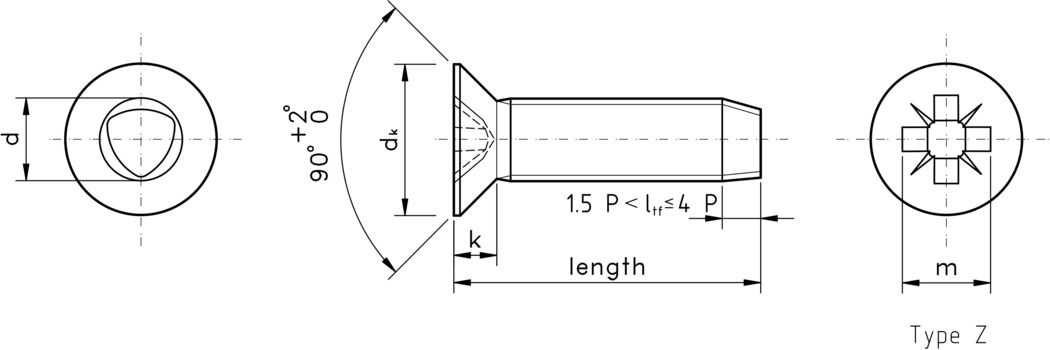
Westfield Fasteners Product Specification:
DIN 7500 - Pozi Countersunk Thread Rolling Screws for ISO Metric Threads
This product guide contains the specification for metric threaded pozi countersunk thread rolling screws, a series of standard parts available from Westfield Fasteners. The basis of this specification is the DIN standard DIN 7500.
Thread rolling screws are designed to tap their own threads into pre-drilled holes in light metals and steel. The end of these screws have a triangular tip and the threads decrease in height towards the tip. This design allows the thread rolling screw to form a thread by forcing the softer material outwards, so no need to tap the hole.
As these tapping screws 'cold form' the thread by displacing it, they don't cause chips and swarf to occur. Another benefit of this method of thread forming is that it increases resistance to vibration and loosening of the fastening,
They are able to create threads into ductile metals to a depth that is twice their diameter. Drilling the correct pilot hole diameter for the screw to form the thread is crucial.
Scope of the DIN standard.
DIN 7500 specifies the requirements for case hardened and tempered metric thread forming screws, with various forms of head geometry. The screws in this standard are designed to form internal ISO metric threads, with a nominal diameter from 2 mm to 12 mm. Part one of this standard outlines the technical specifications for the screws, and part two provides guidelines for the hole diameters required. Table 1 below defines the dimensions for these metric torx pan thread rolling screws. Table 2 defines the recommended hole diameters for fitting of these thread rolling screws, in both steel and aluminium.

